Education
A Beginner's Guide to Dreamscapes
By EyeEm Team - 6 min read

In this hands-on tutorial, uponadaydreamer shows you how to create dreamlike, surreal and atmospheric images in six simple steps. Read on to get to know how you can create your very own dreamscapes.
In this hands-on tutorial,uponadaydreamershows you how to create dreamlike, surreal and atmospheric images in six simple steps. Read on to get to knowhow you can create your very own dreamscapes.
Hello everyone!
For these photos I’ve used my iPhone4 and the following apps for processing: Timer app, Water my photo, Lenslight, Snapseed, Photoforge2 and Camera+. You may also use Blender instead of Photoforge2.
First of all, all of these images use a “cloud image” in some way. So step one would be to look up in the sky and take a picture of clouds with the native camera.
Now let’s start:
1. Timer app (doesn’t take high-quality images, but is most effective in taking a bunch of pictures on a timer… and it’s free):
I took a couple pictures of me walking and dragging that scarf. I chose my favorite, and went from there.
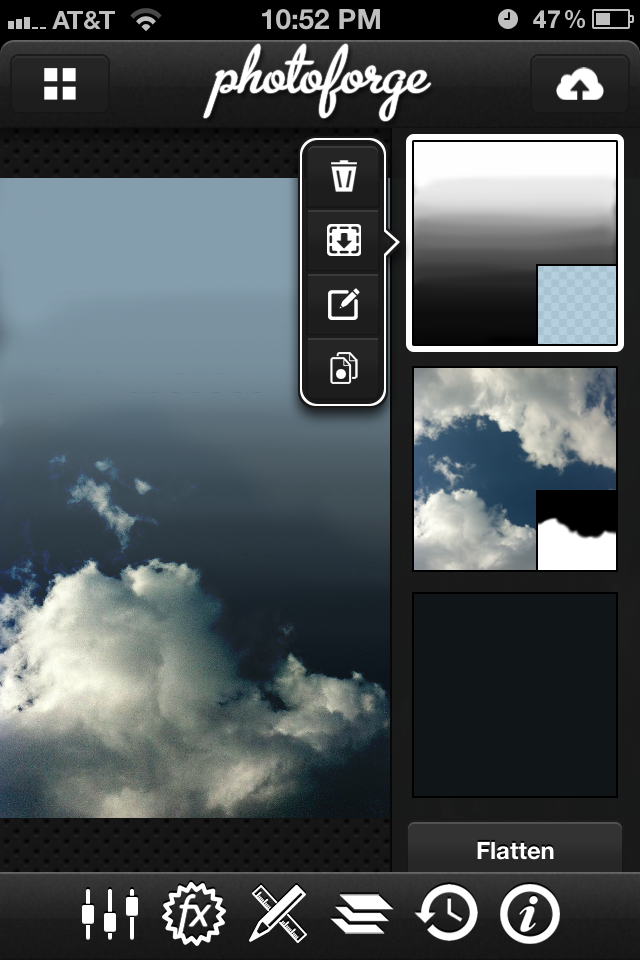
2. PhotoForge2(difficult to use for masking, but great to use for layering! You may also use Blender instead.):
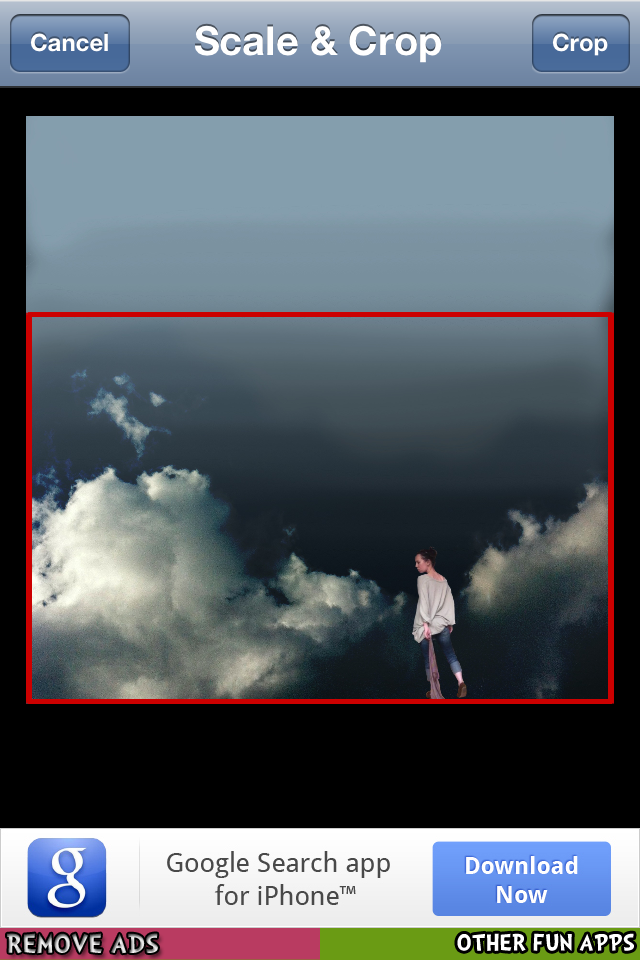
A. I started a new project by adding my cloud image. Using the layering options, I rotated my cloud image so that a nice billow of cloud laid along the bottom or the image. I cropped the picture so it’s basically a rectangle with clouds emerging from the bottom of the image.
B. I then added a new layer, and brought in my timer app self-portrait. Using the masking tool, I removed the background, so it is just my figure left. Using the “move” tool, I then re-positioned that image to the bottom of the image.
C. I added a new color layer of black behind the two images. I used the “layer blending” option on the cloud layer to make the blue sky fade in to black… if that doesn’t work, one can also use the masking tool to hide the blue sky.
D. Save image!


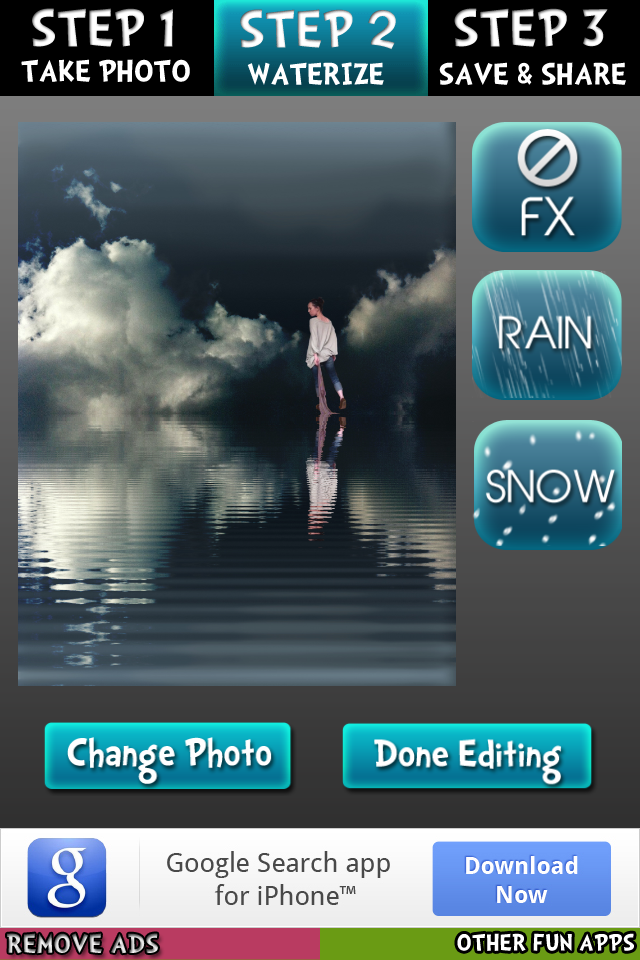
3. Water My Photo app
A. Open the saved image fromPhotoforge2. This app makes the water-like reflection and elongated the image.
B. Save!
4. Lenslight:
A. Open the water image. Use the “sun” light option. Align light to highlight the horizon. This adds character and helps to hide the fact my feet are slightly floating.
B. Save!

5. Snapseed:
A. Open lenslight-saved image. Make slight adjustments using the adjustment tool (fixing contrast issues, adjusting ambiance, reducing saturation…)
B. Use Vintage tool option to unify image: this helps to make the image look like it’s one image, rather than a bunch of pieces thrown together. I picked a filter option that made the image look dark and brooding.
C. Save!

6. Camera+:
A. Bring in Snapseed image. Adjust lighting to “cloudy” filter. This helps to unify the image as well by uniting the lighting.
B. Add “Vintage” frame, and add a signature caption if you want to.
C. Save. openEyeEm and upload the photo to the album
Finished! Now make your dreams become reality and add your shots to the albumDreaming
Have fun!