Education
10 Tips for Taking Stunning Silhouette Photos with Your Smartphone
By Maddie - 7 min read

Founder of the iPhone Photography School Emil Parkarklis shares how to take stunning silhouette photos with your phone.
Emil Pakarklis is a passionate iPhoneographer and the founder of iPhone Photography School, a website dedicated to taking and editing better photos with the iPhone. Today he will share some great tips to help you improve your mobile photography. Thanks Emil!

Silhouetting is one of the most interesting creative photography techniques. By hiding your subject in the darkness, silhouetting creates a sense of mystery in your photos, allowing the viewer to fill in the blanks and create their own unique story from the photograph. Here are 10 simple and techniques to make sure your silhouette photos always look amazing.
1. Shoot against the source of light
The human eye has a much larger dynamic range than the sensor of any camera. Our eyes can easily recognize a person standing against the sunset sky, but when you take a photo of the same portrait, you’ll get something entirely different.
As long as the source of light is located behind your photography subject, the subject stays in shadow and automatically turns into a silhouette when you take a photo. If you shoot outdoors, it’s essential that the sun is relatively low above the horizon, which is why sunsets, sunrises and winter days at higher latitudes are perfect for silhouette photography.

2. Find interesting and unique subjects
While it’s easy to take silhouette photos, they won’t look good unless you find interesting photography subjects – ones that will really make your photos memorable.
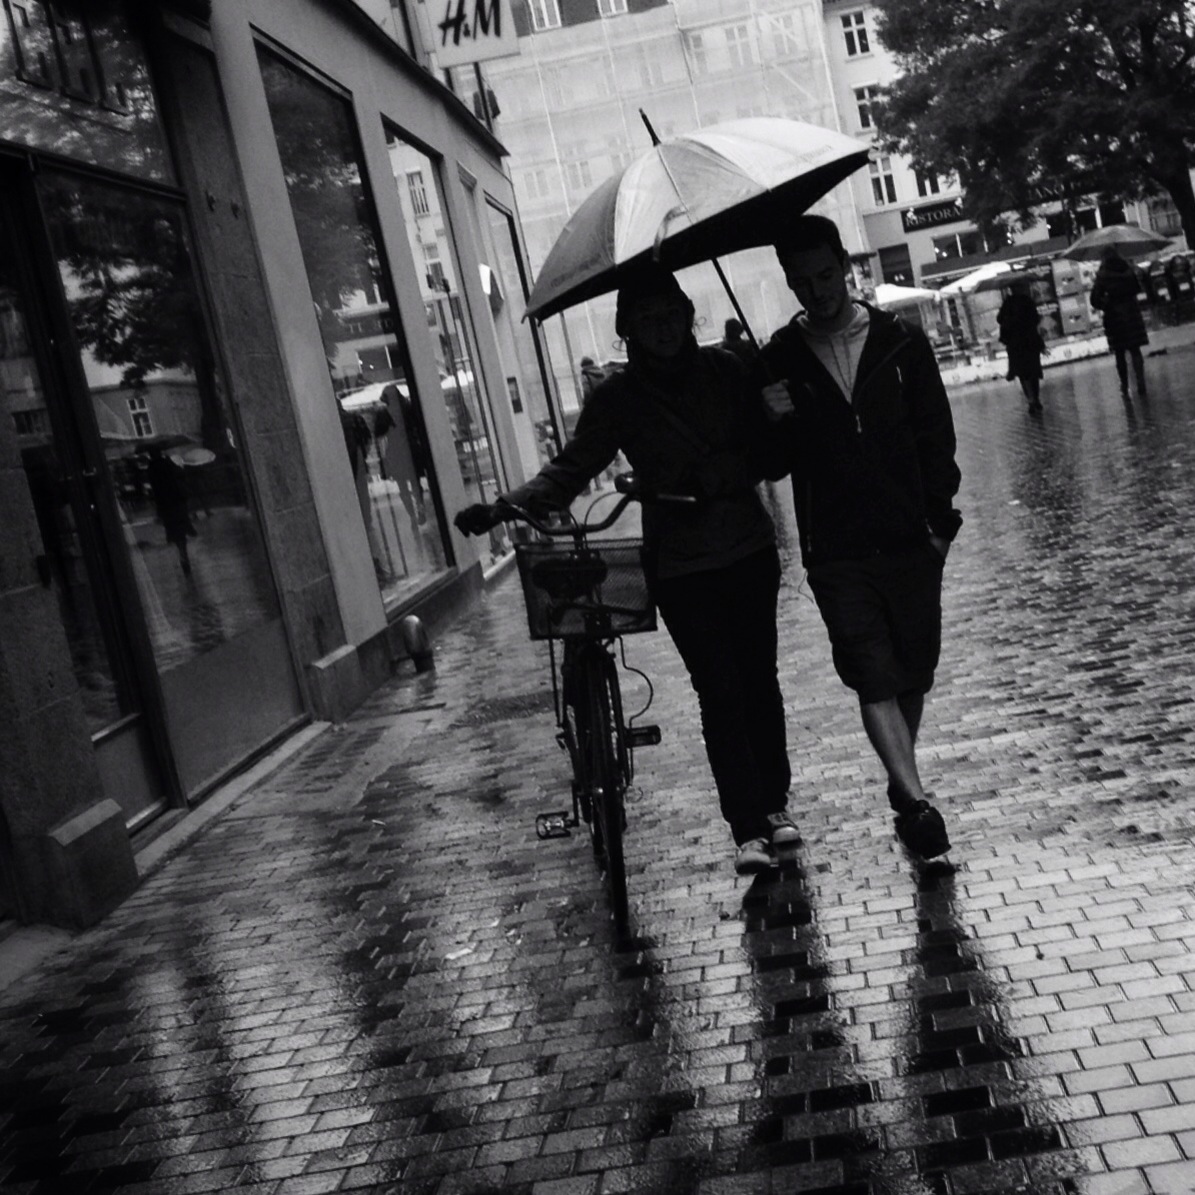
My favorite subjects for silhouettes are other people, followed by birds, trees and human-made structures. I particularly like taking silhouette photos of people because they always leave you curious about who the person in the silhouette might be and what they might look like.
3. Only pay attention to the outline of your subjects
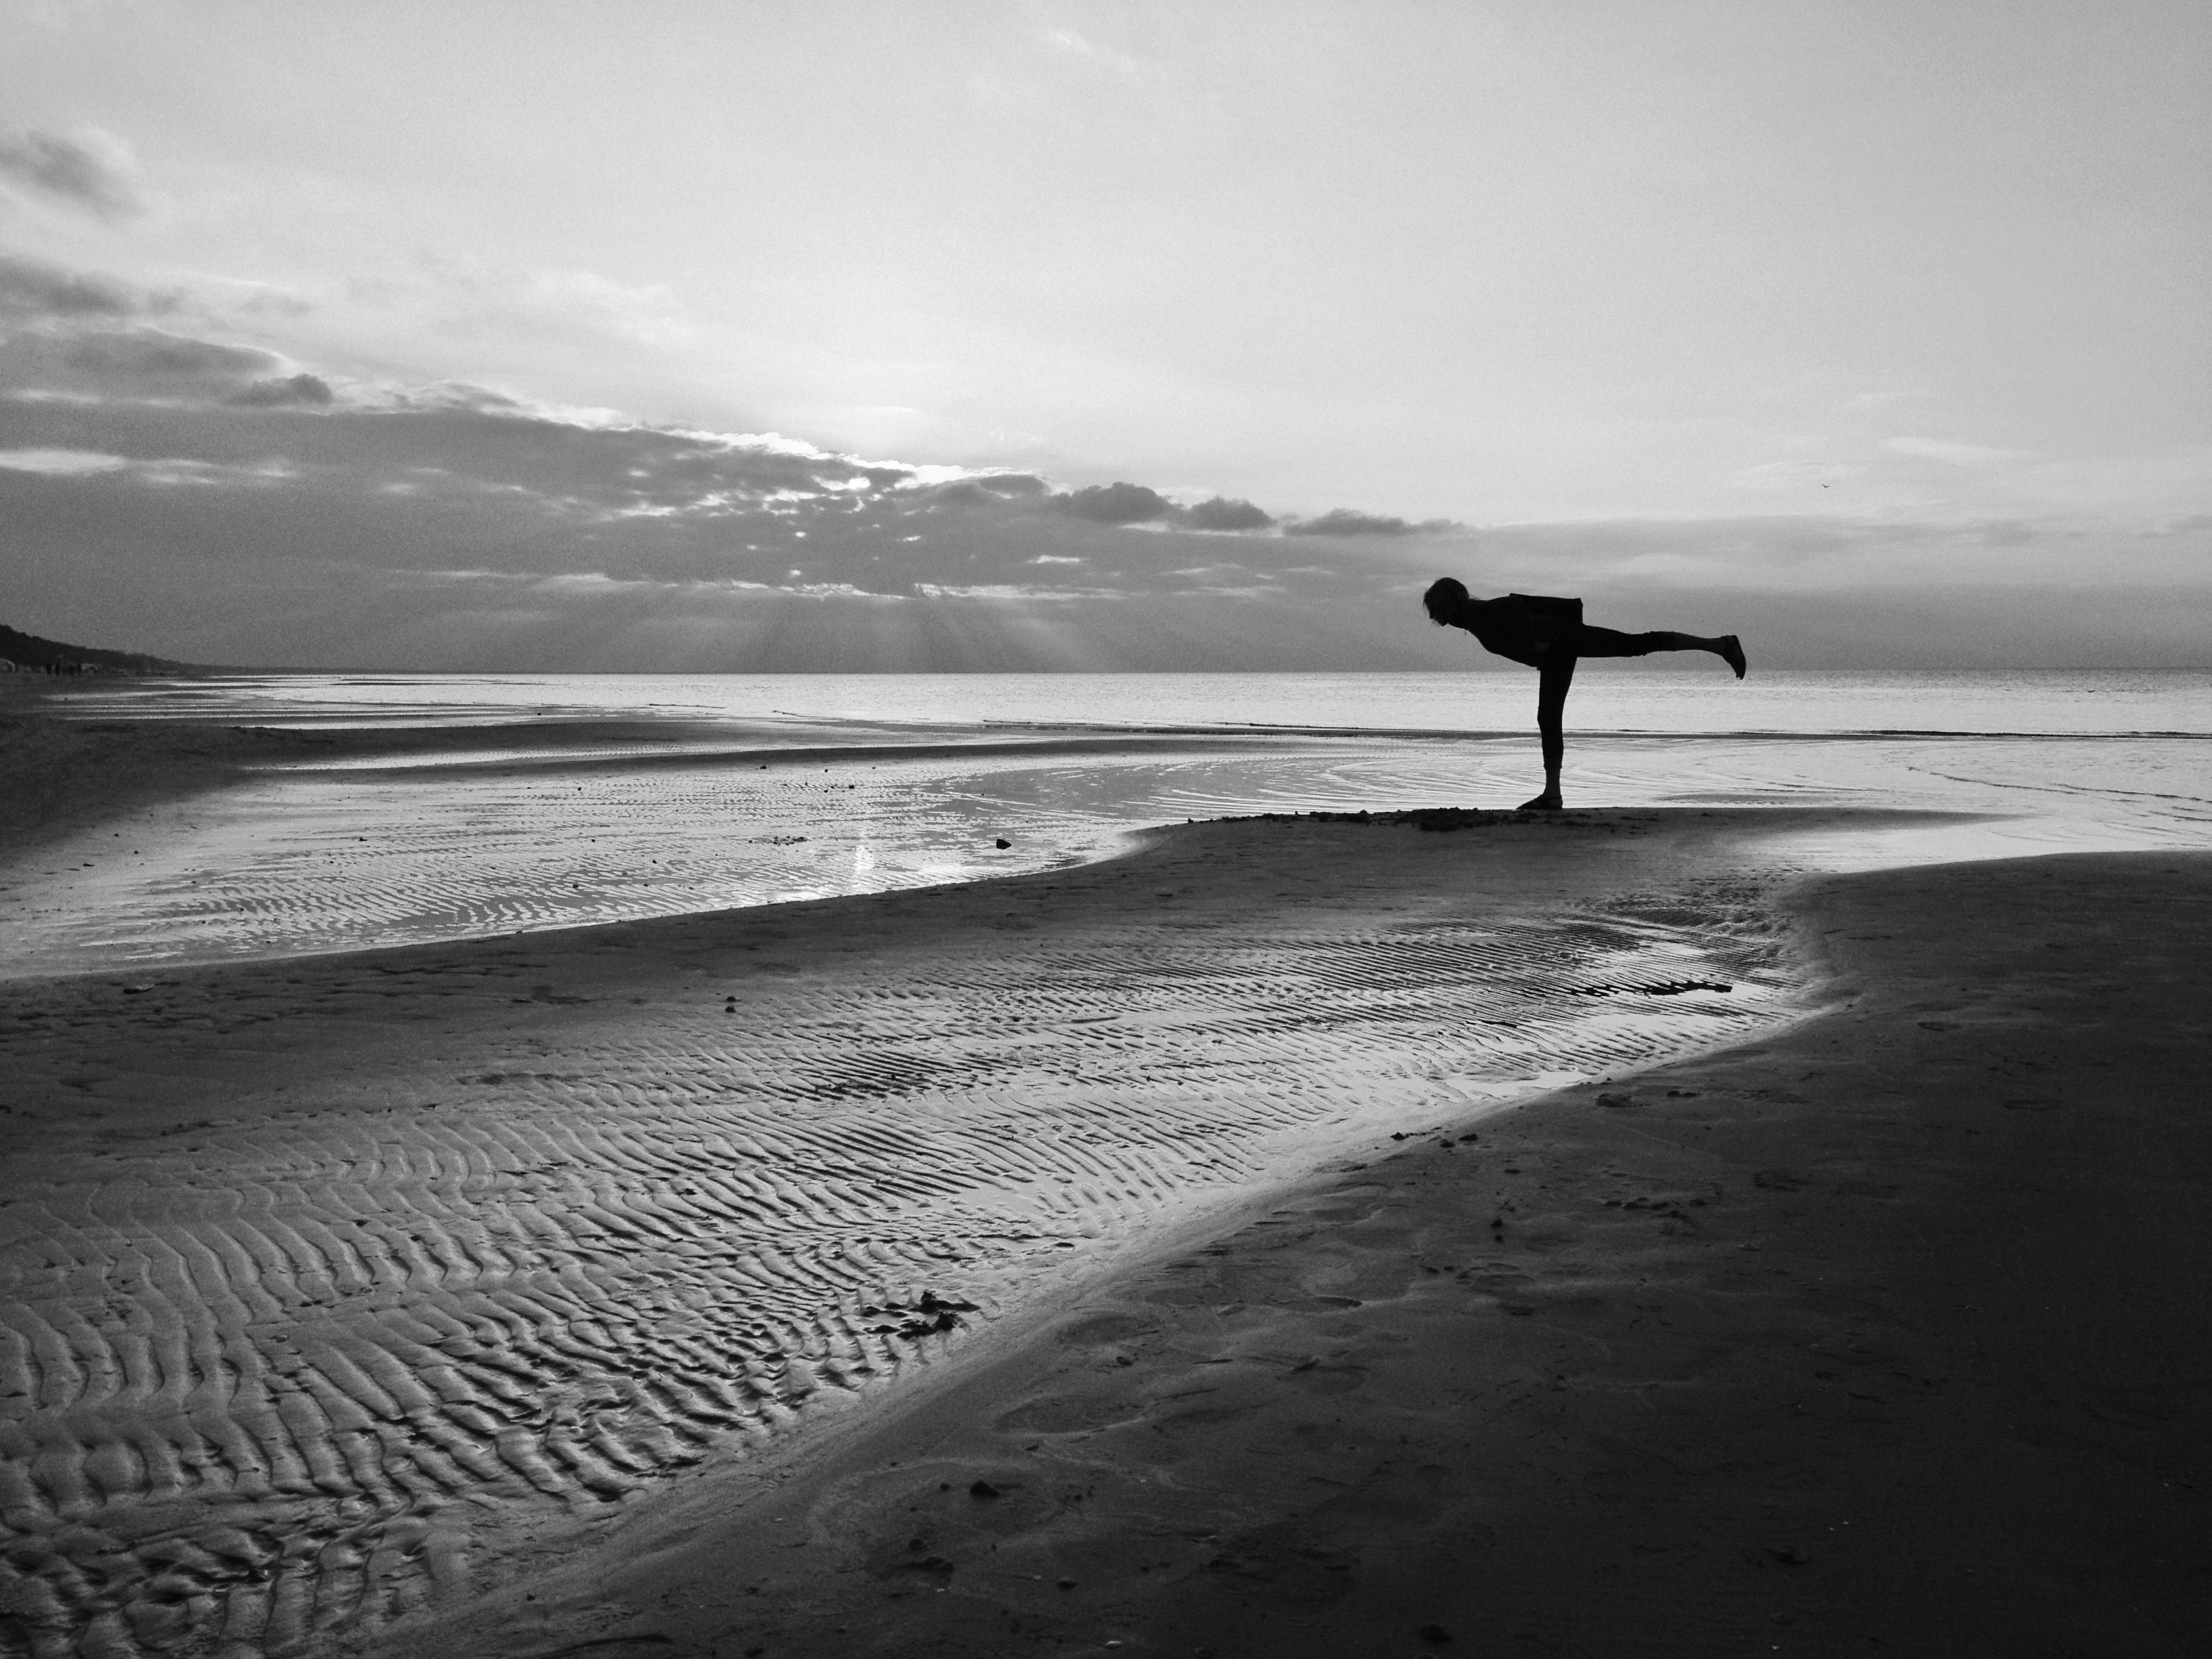
When you’re photographing a person’s silhouette, it doesn’t matter what their facial expression is because you’ll only see their outline. On the other hand, the outline itself can make a huge difference, so you must learn to look at your photography subjects in terms of their outline. As you try to make the best possible silhouettes of human subjects, you’ll notice that minor things like the position of their limbs can make a massive difference.
If your subjects are moving, try taking photos in burst mode (which you can activate by holding down the shutter of the iPhone) so you can pick the exact right moment later. Also, avoid overlapping subjects such as people standing in front of each other. Because you can only see their combined outline, overlapping subjects are confusing and generally don’t look good.
4. Set exposure manually
If your subjects are relatively small and don’t take up a large part of your photo, your smartphone’s technology will automatically set exposure for the largest parts of the photo and leave your silhouettes in the dark. But if your subject takes up a large part of the photo, you have to set exposure manually.
You can do this by tapping on the brightest parts of the image outside your subject, which will set exposure (and focus) for that point and also turn your subject into a silhouette as long as the light is coming from behind.
5. Capture movement
Try to capture movement in your silhouette photos whenever possible. When you’re shooting silhouettes, the shutter speed will typically be very fast, allowing you to capture short and unique moments that would likely get blurred in most other conditions.
Once again, burst mode is the perfect tool for taking photos of movement so that you can capture the exact right moment.

6. Hide the sun behind your subject
When you’re shooting against the sun, you’ll often have issues with the sun blowing out (making white) large parts of your photos. Lens flare can also be a problem when you take photos directly against the sun. While lens flare can sometimes be used for a creative effect, more often than not it’s a good idea to leave the sun out altogether by hiding it directly behind your main subject.
If your subject is narrow (such as a standing person), you’ll also get interesting shadows coming towards you. If you then get down on your knees (or lower), you can make these shadows look much larger, which often look great because they lead the viewer’s eye directly towards your subject.

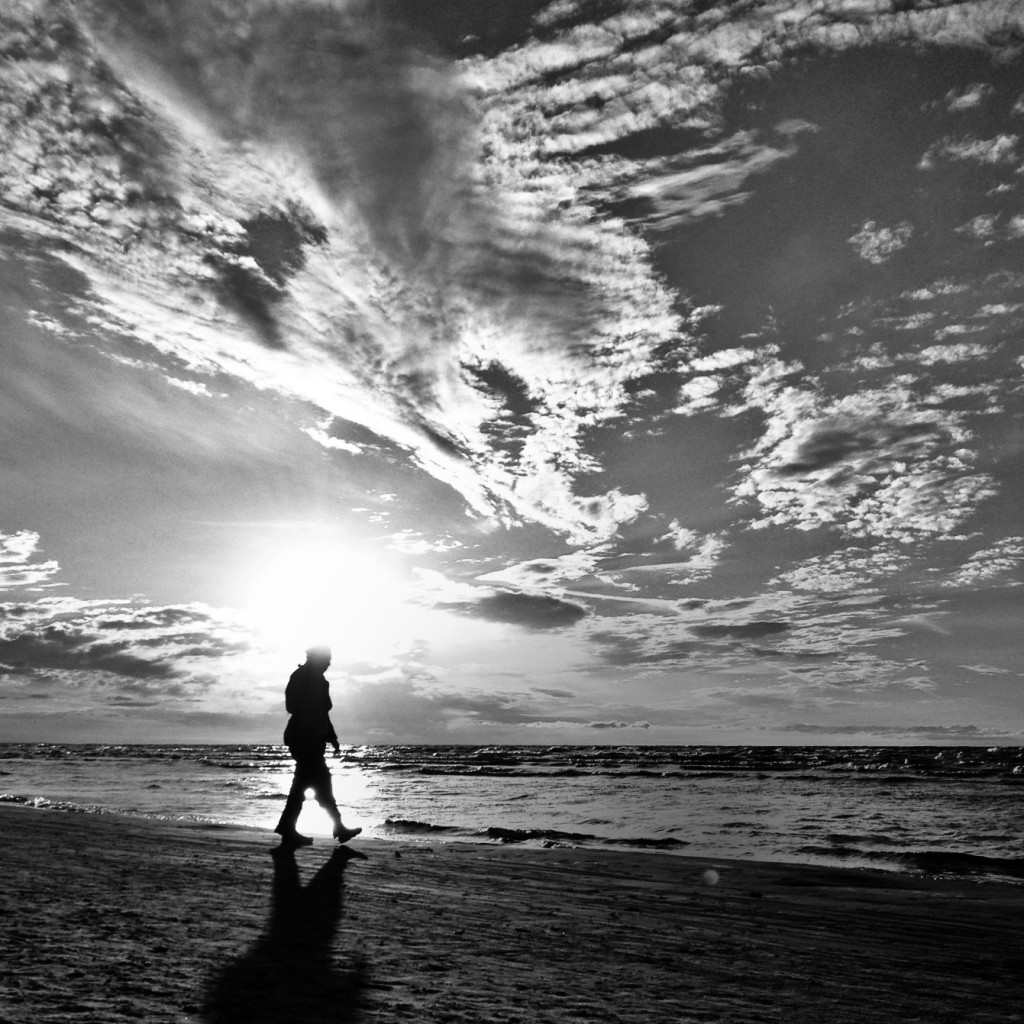
7. Look for interesting clouds
It is particularly important in silhouette photos to be aware of the background that you place your silhouettes against. When using the sky as the background, look for interesting patterns and formations in the clouds to see how you can juxtapose them with your silhouette to create a truly unique photo.
8. Take photos from a low angle
Shooting from a low angle is another trick that you can use to greatly improve the surroundings of your silhouettes, because it allows you to position your subjects against unique backgrounds. Don’t be afraid to get down on your knees – or much lower if you need to.

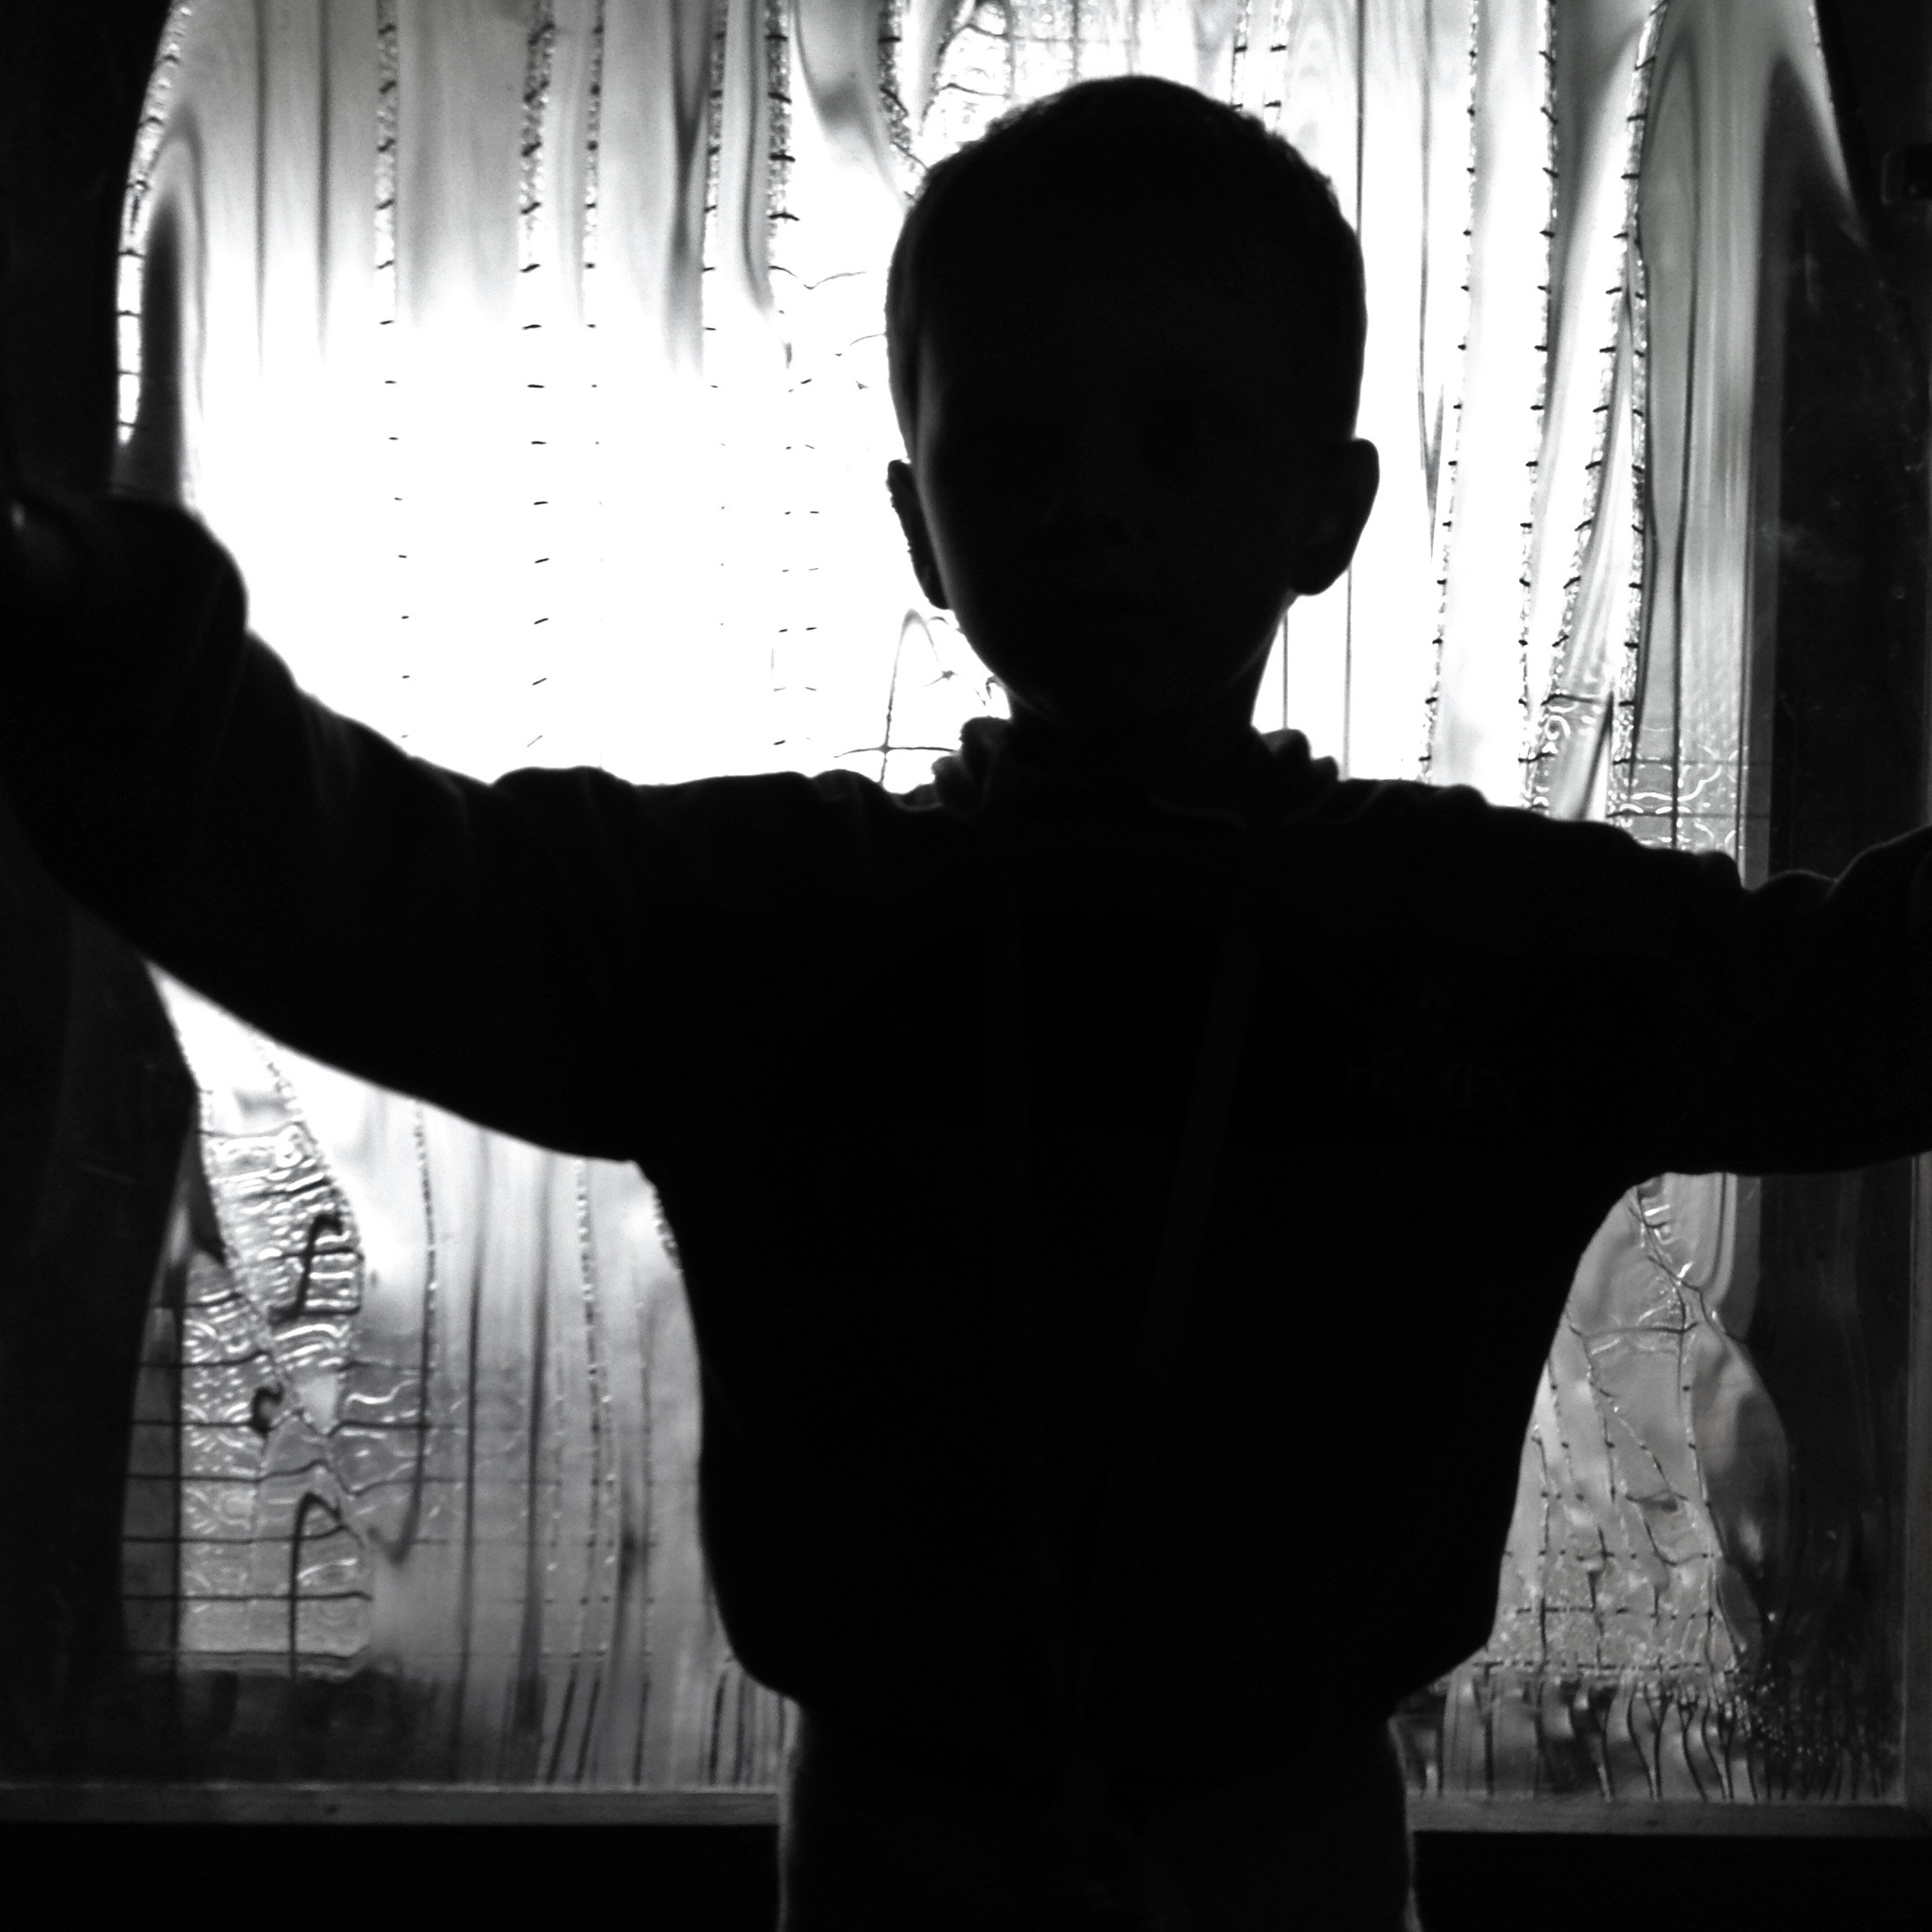
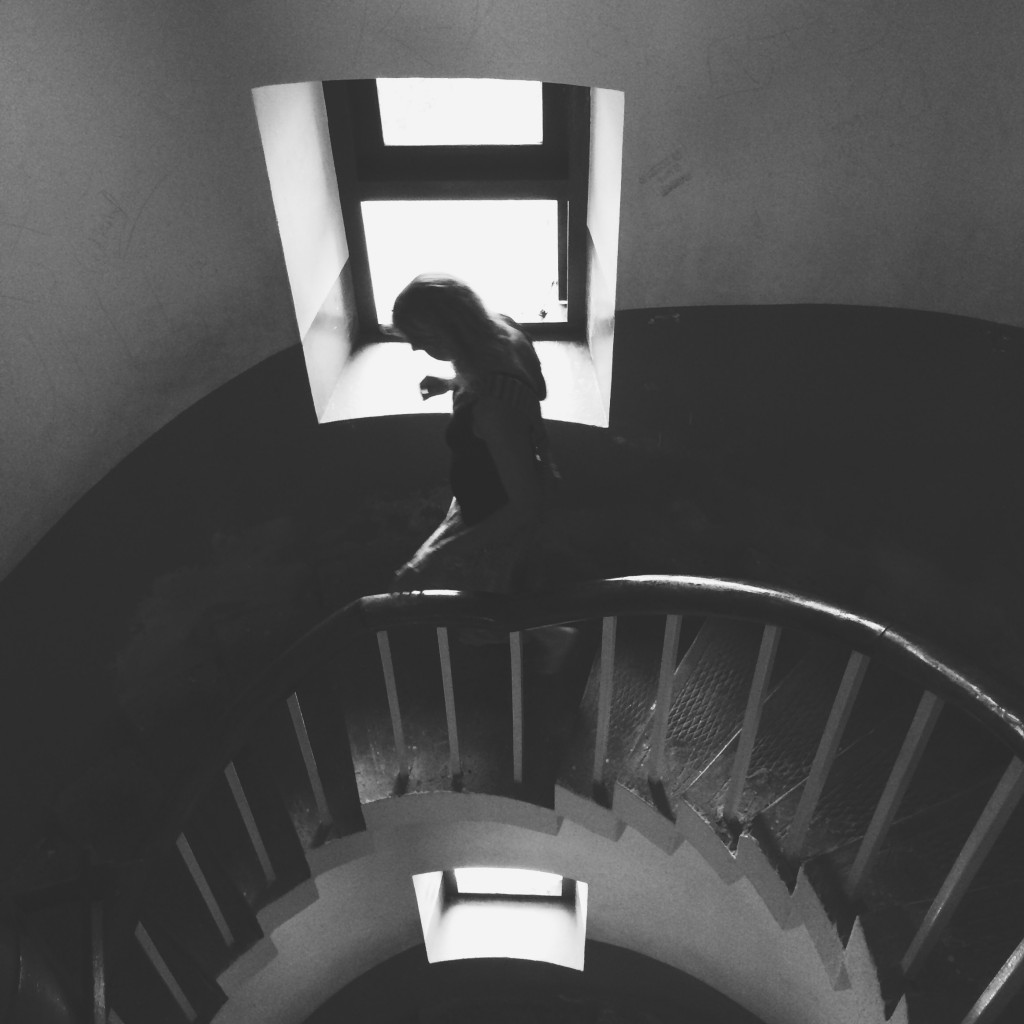
9. Shoot against doors and windows
While most silhouette photos are taken outside, you can also capture unique silhouettes indoors as long as you’re shooting against the source of light. This works particularly well when the majority of light enters the room through a window or door, which was the case in this lighthouse.
10. Emphasize silhouettes in post-processing
While entire books could be written about post processing, it’s important that your silhouette still stands out afterwards. If you use slider adjustments to edit the photo, it’s a good idea to increase contrast to make the silhouettes stand out more. If you’re using filters, pick ones that don’t make the blacks softer or the highlights darker, which would deemphasize the silhouette.

Thanks for sharing Emil! You can check out more tutorials from Emil here.
For more tips and tricks, look no further!
• 5 Ways to Improve Your Concert Photography Skills
• 10 Tips & Tricks on Shooting Photos in Low Light
• 10 Tips & Tricks for Shooting Great Portraits